
Microsoft Exchange IMAP Migration
In this blog, I will perform Microsoft IMAP Migration in Microsoft Exchange Admin Center. IMAP Migration is one of the most common migrations for small businesses and we will see the step-by-step process of doing that and the things we need to keep in mind while performing Migration
5/22/20242 min read
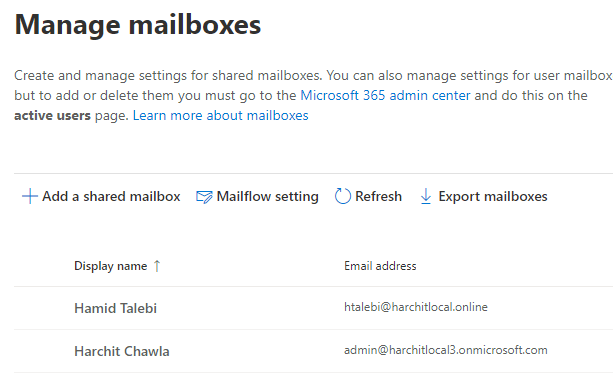
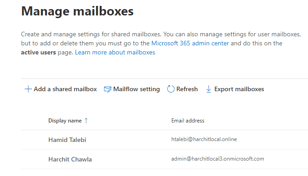
I only have two mailboxes in my exchange admin center currently
STEP BY STEP PROCESS FOR IMAP Migration
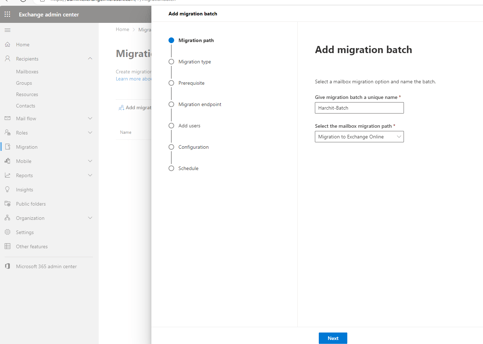
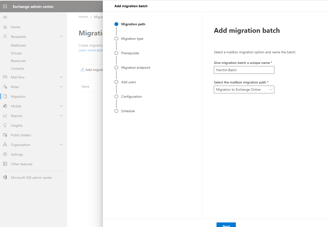
Select Migration and Add Migration page option. I have named my batch as Harchit-Batch, and I am migrating the migration path is 'Migration to Exchange Online'
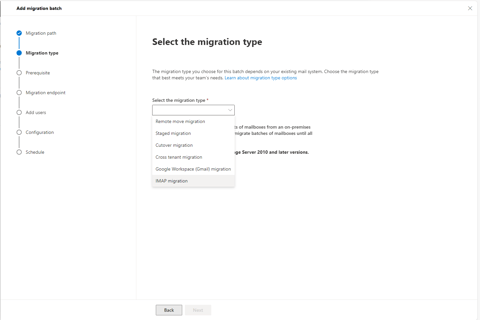
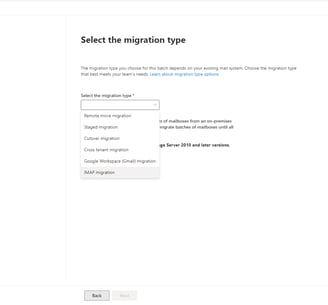
Migration Type is 'IMAP Migration'. Click Next
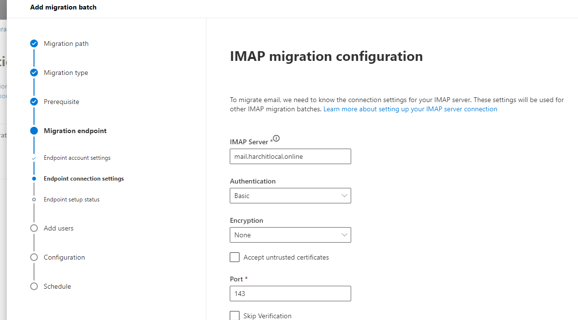
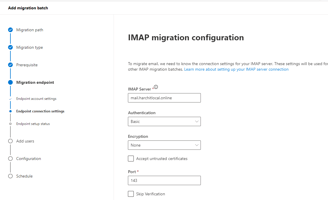
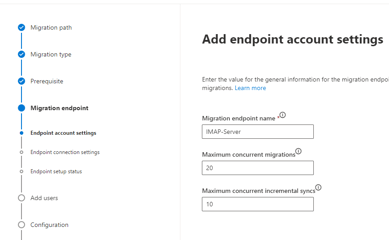

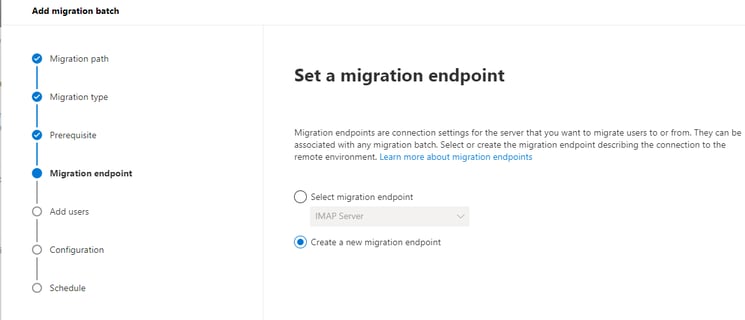
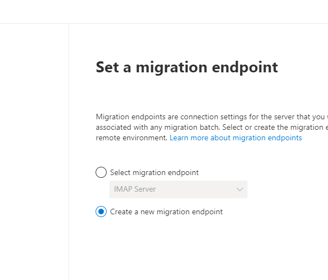
Let's create a New migration Endpoint
Migration endpoint name can be unique and Maximum concurrent migrations and incremental syncs are left as default.
In the IMAP migration configuration, I have specified the FQDN of my IMAP Server where the user mailboxes which I want to import are present and the port as 143. We can set the encryption as SSL or TLS as well but in this case, it is kept as none and the Authentication as Basic. Click 'next'
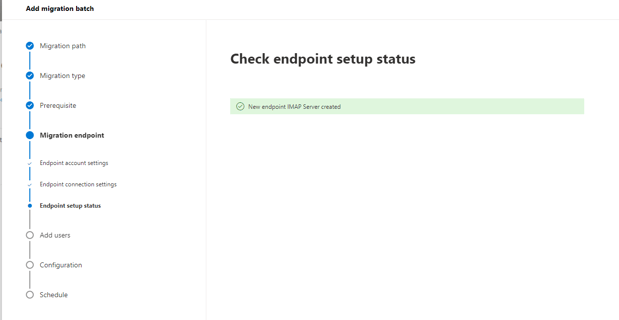
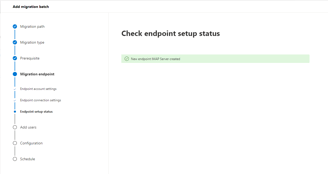
Our IMAP server will be created once the FQDN IMAP server can be reached. Click Next
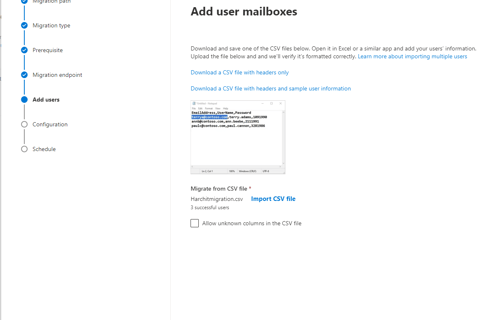
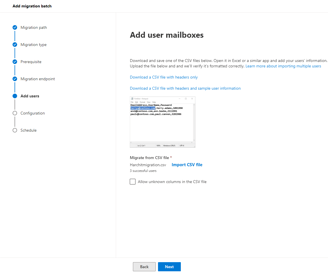
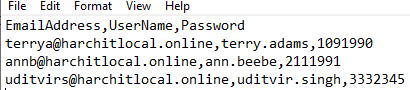
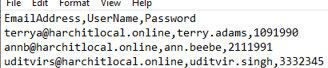
In the Add user mailboxes section, I am going to import the users from the csv file, so I made a CSV file in notepad which looks like the screenshot below. While saving this notepad file, add .csv at end instead of .txt
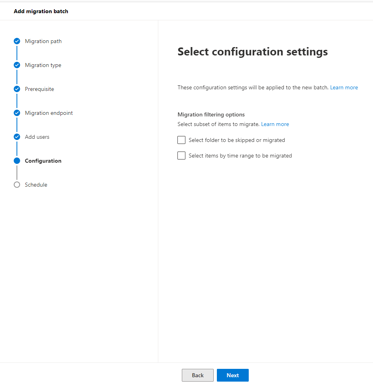
Click 'next' since we don't need to perform any Migration filtering in this scenario
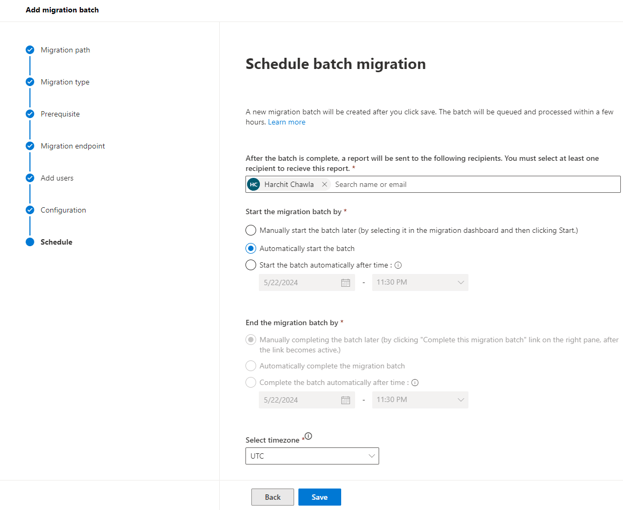
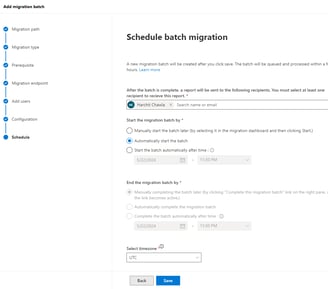
We need to select at least one recipient so that we can receive the notification of the completion of the migration. We can have an Microsoft exchange administrator as that user. We can also schedule the migration immediately or at a specific time. Click Save
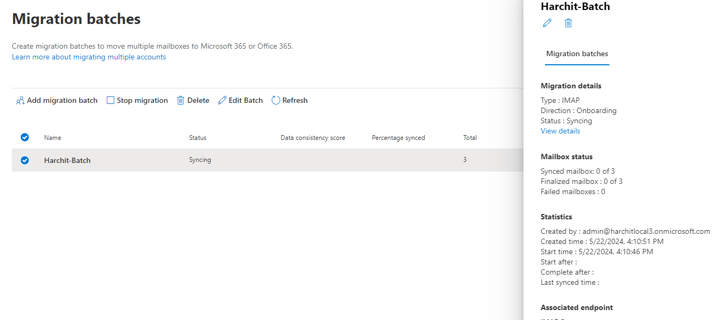
We can see our Migration batch syncing. Depending on the number of mailboxes to sync, it can take up to an hour for proper completion. Once it is completed, we will receive the email in our chosen recipient account in Step-9